. home . interests . coffee .
I am definitely a coffee geek. My real passion is cappuccino, and I've been brewing espresso at home for over 11 years now. I have taken it upon myself to document just what it is that makes a perfect cappuccino at home. I've had a lot of friends ask about the type of machine to get, the beans to use, the grind, the tamping, and the pull length, so this page attempts to summarize what I use. Please also see this home espresso machine f.a.q., which is a spectacular summary of everything you need to know.
The machine
 There are two main types of espresso machines out there: Steam- and Pump-driven.
The stream-driven type is the Krupps or Braun that you may find at your local
department store, and will typically cost around $60. This type of machine
uses a large resevoir of water, and when the power is switched on, boils the
water and uses the generated steam to pressure through the espresso grounds.
This is a Bad ThingTM because it cannot provide constant pressure,
can only provide about one-quarter of the pressure you really need,
and does so for only a short amount of time. You'll most likely be left with
weak, cold coffee. If you want a real espresso machine at home you're going
to have to spend some money.
There are two main types of espresso machines out there: Steam- and Pump-driven.
The stream-driven type is the Krupps or Braun that you may find at your local
department store, and will typically cost around $60. This type of machine
uses a large resevoir of water, and when the power is switched on, boils the
water and uses the generated steam to pressure through the espresso grounds.
This is a Bad ThingTM because it cannot provide constant pressure,
can only provide about one-quarter of the pressure you really need,
and does so for only a short amount of time. You'll most likely be left with
weak, cold coffee. If you want a real espresso machine at home you're going
to have to spend some money.
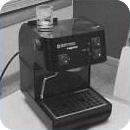
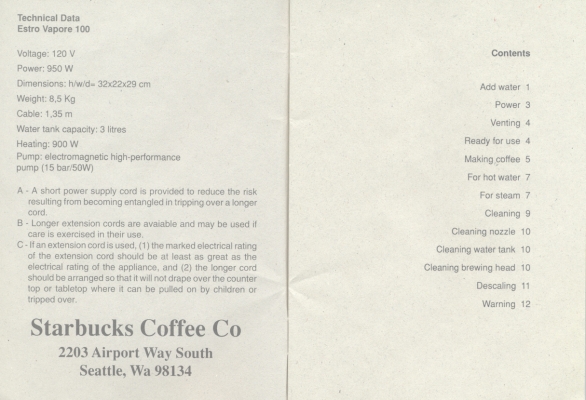
That leads us to the pump-driven machine. This uses a seperate machanism for pressurizing and heating the water, and can provide constant and high pressure and temperature. It also allows for continual brewing without having to wait for a new vat of water to boil, and can provide the 8-9 bars of pressure needed to correctly make espresso. These machines are typically your 'pro-consumer' level, and start at about $300. The brands to look for are Rancilio, Estro, Saeco, and La Pavoni. I own an Estro Vapore purchased in '95 from Starbucks for $400. For Christmas 2005 I received a Rancilio Silvia, so the Estro has been relegated to storage.
 The Rancilio Silvia is probably the most popular home espresso machine for coffee geeks,
and for good reason. It has been around for many years, and Rancilio has perfected
this machine. It is of solid, metal construction. It produces very consistent espresso,
and with a little tweaking of the grind and tamp, I was able to hit the Golden Rule (2 to
2.5 fluid ounces of water pulled through approximately 14 grams of ground coffee in
about 20 to 25 seconds). You can read more about the machine
here.
The Rancilio Silvia is probably the most popular home espresso machine for coffee geeks,
and for good reason. It has been around for many years, and Rancilio has perfected
this machine. It is of solid, metal construction. It produces very consistent espresso,
and with a little tweaking of the grind and tamp, I was able to hit the Golden Rule (2 to
2.5 fluid ounces of water pulled through approximately 14 grams of ground coffee in
about 20 to 25 seconds). You can read more about the machine
here.
The grinder
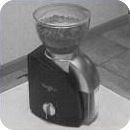 There are also two types of grinders: Blade and burr grinders. You'll want to
avoid blade grinders at all costs, because it just cannot get a fine enough
grind for proper espresso. A burr grinder uses a set of metal burrs to crush
the beans, and can generally be set from a course (drip) grind all the way
to Turkish coffee
(practically coffee dust) settings. A good burr grinder should cost you more than $120.
Trust me, you cannot use a blade grinder and just let it grind for a longer time.
There are also two types of grinders: Blade and burr grinders. You'll want to
avoid blade grinders at all costs, because it just cannot get a fine enough
grind for proper espresso. A burr grinder uses a set of metal burrs to crush
the beans, and can generally be set from a course (drip) grind all the way
to Turkish coffee
(practically coffee dust) settings. A good burr grinder should cost you more than $120.
Trust me, you cannot use a blade grinder and just let it grind for a longer time.
The beans
It really is all about the beans. You'll want a dark, well-roasted type. French roast is probably too dark, though. Starbucks' Espresso Roast is what they use in their espresso production, and is a decent roast for home, too. It will cost you about $10 per pound. It's not the best, and most likely it's been roasted a long while before you buy it. You'll want beans that have been roast 4 - 14 days before use. I use Greenberry's Espresso Roast. Be sure to buy it whole bean. You want to grind the coffee beans just before you're ready to brew. Keep the beans stored at room temperature in an air-tight container. If you must store the beans for more than a week, they can be frozen. The important thing is to use the beans as soon as possible after they have been ground (within 20 minutes). All the oils in the grounds will start to evaporate, and the espresso pull will be quick and weak.
The auxiliary equipment
 There are a few more items to get. You'll want two shot glasses (2 oz.'s each),
preferrably with marks at the 1 and 2 oz. levels. You'll also need a stainless
steel pitcher for the milk. It should hold about a quart. Be sure to get an
entirely stainless steel one; you don't want any rubber on the handle.
This is because you need to be able to feel the temperature through the handle
and sides. Or, you can also buy a thermometer ;-). The original metric I was
taught was to heat the milk until you cannot keep your hand on the side of the
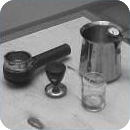
pitcher for more than 1 second. We'll get to that later. Also, buy a tamper
(center of the picture),
which is a small device that you grip with one hand and use to push down onto
the ground beans to flatten and press them into the portafilter.
The portafilter is the item on the left side of the picture. It has a large
handle and a fine metal mesh basket.
You'll need a large spoon, whole milk, and a proper cappuccino
mug. I recommend a large, white mug with small finger ring, accompanied by
a saucer.
There are a few more items to get. You'll want two shot glasses (2 oz.'s each),
preferrably with marks at the 1 and 2 oz. levels. You'll also need a stainless
steel pitcher for the milk. It should hold about a quart. Be sure to get an
entirely stainless steel one; you don't want any rubber on the handle.
This is because you need to be able to feel the temperature through the handle
and sides. Or, you can also buy a thermometer ;-). The original metric I was
taught was to heat the milk until you cannot keep your hand on the side of the
pitcher for more than 1 second. We'll get to that later. Also, buy a tamper
(center of the picture),
which is a small device that you grip with one hand and use to push down onto
the ground beans to flatten and press them into the portafilter.
The portafilter is the item on the left side of the picture. It has a large
handle and a fine metal mesh basket.
You'll need a large spoon, whole milk, and a proper cappuccino
mug. I recommend a large, white mug with small finger ring, accompanied by
a saucer.
Preparations
Turn on the machine and set it to steam mode. Let it warm up for a good 5 to 10 minutes. Pour 1 cup of cold whole milk into the milk frothing pitcher, and put the thermometer into place (there should be a small clip that clips onto the side of the pitcher). Put the burr grinder on the epsresso setting (should be very fine, such that the static eletricity after grinding causes some espresso dust to dance about). Grind for about 10 seconds, or enough to fill the portafilter (approximately 1/3 cup of unpacked ground coffee). Do not put the ground coffee into the portafilter yet. Just set it aside.
Frothing the Milk
When the machine is ready in frothing mode (my machine has a green light that comes on), open the valve for a few seconds to clear out any water until just steam comes out. Put the frothing wand completely into the milk in the pitcher. Turn on the valve again and keep the end of the wand completely submerged until the temperature of the milk reaches 120 degrees F. At this point the pitcher should still be half empty. Now, next is the imporant part, and difficult to describe. Lower the pitcher until the tip of the wand is just at the surface of the milk. The sound should change drastically, and foam should be generated. If the milk is sputtering and splashing, raise the pitcher slightly to submerge more of the wand. You may have to oscillate up and down slightly. Do this as more foam builds up until the foam is at the top of the pitcher, and the temperature is exactly 160 degrees F. Do not go over this temperature, as scalded milk is quite disgusting and the most common problem in bad cappuccinos. Turn off the frothing valve and lower the pitcher, placing it on a heat-safe surface. Be sure to wipe the end of the frothing wand with a damp cloth to remove the milk foam. It's easier to clean it now than to scrape off dried milk later. The resultant foam should have the consistency of whipped cream and able to be scooped easy.
pulling the shots
Take the machine out of frothing mode, and into espresso shot mode. When it is ready (again, green light), turn it on and hold the empty portafilter under the now running water for a few seconds to wash it with the hot water. Turn off the water and dump out any remaining water in the portafilter. This allows the metal to heat, and provides a much better pull than it you were to use a cold portafilter. Now gently pour the ground coffee into the portafiler until it is to the top (unpacked). Now take the tamper and press down one or two good times, making sure the grinds are packed down. There are a lot of different schools of thought when it comes to tamping, and I'm of the school that packs it in quite a bit, providing a stronger, slower pulled shot. If you prefer your espresso weaker and more 'watery', do not tamp it as hard. The portafilter should now be filled half-way with packed grinds.
Put the portafilter into place (lock it in) and place the two shot glasses under the spouts. Turn on the pouring mode and wait for the two shot glasses to fill 1 oz. each. Here are some metrics to test to determine whether or not you have pulled a 'good shot': It should take between 18 and 24 seconds to pull the complete 2 ounces (1 ounce in each shot glass). The quicker the pull, the weaker the shot. Longer, and it's more bitter. It should drip like honey from the portafilter. Also, there should be a nice layer of light tan-beige 'crema' on top of the shots. If the shot comes out too quickly, try tamping it harder or add more grinds. If it comes out too slowly, try using less coffee grinds.
combining it all
So now you have to determine what type of drink you want. If you want a cappuccino, pour the shots into the mug, then using the spoon, hold back the foam and add just the steamed milk until 2/3 of the mug is full. Then add the foam by scooping it out with the spoon. If you want a latte, pour in the espresso shots, and fill up the rest of the mug with the steamed milk. Then put a small amount of foam on top. For an americano, pour in the two shots, and add hot water until the mug is full (no need for the milk). For a Mocha, make a latte and add chocolate syrup.
conclusion
 So, there you have it. My experience summed up so hopefully you
can also enjoy fine espresso beverages at home. Any questions?
Please e-mail me.
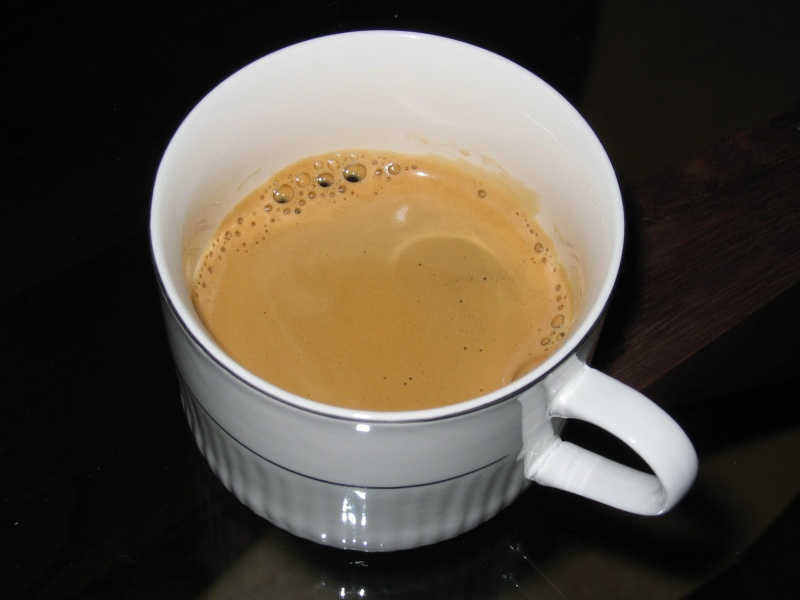
The picture to the right is a perfect 25-second pull with ideal crema.
Not bad for a 10-year-old heavily used machine. Click for a larger
image.
So, there you have it. My experience summed up so hopefully you
can also enjoy fine espresso beverages at home. Any questions?
Please e-mail me.
The picture to the right is a perfect 25-second pull with ideal crema.
Not bad for a 10-year-old heavily used machine. Click for a larger
image.
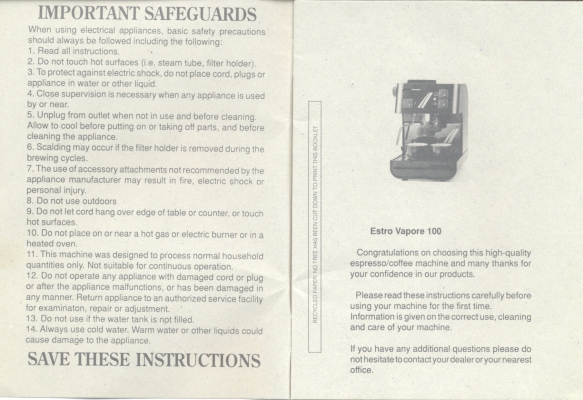
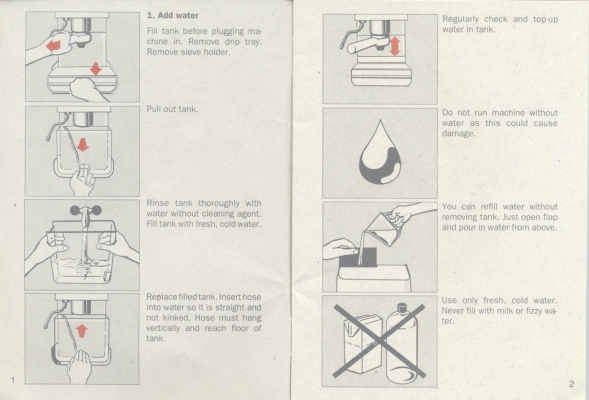
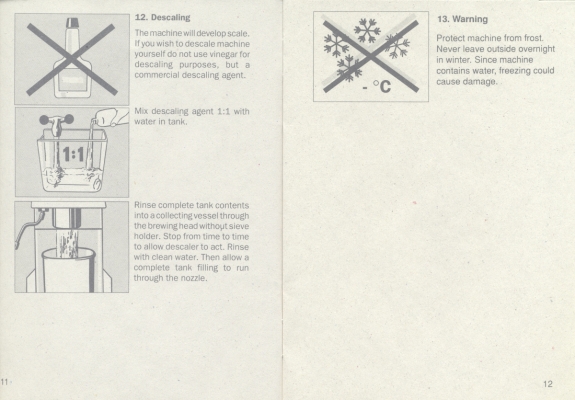
A lot of pople have asked for a copy of the instructions for the Estro Vapore, so I scanned them in:
- cover
- safeguards
- contents
- pages 1 and 2
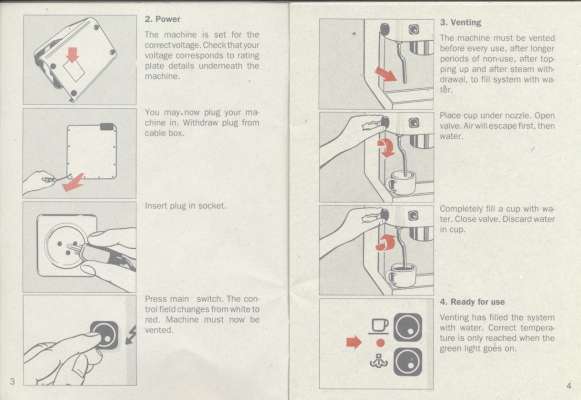
- pages 3 and 4
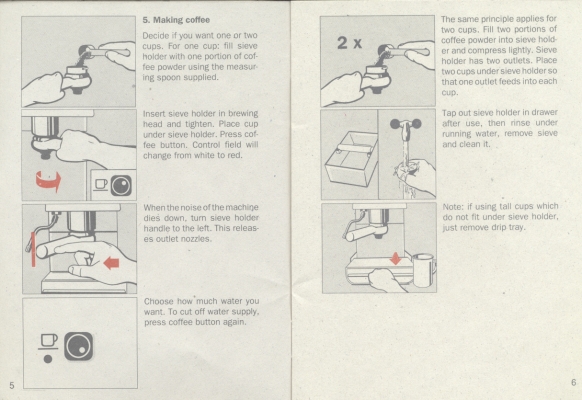
- pages 5 and 6
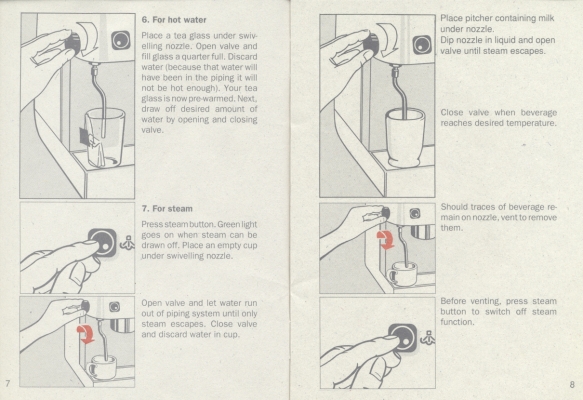
- pages 7 and 8
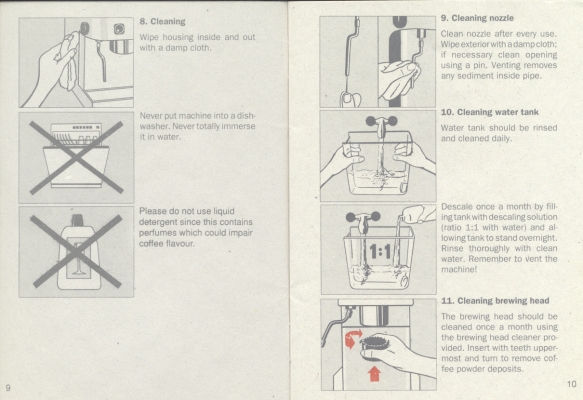
- pages 9 and 10
- pages 11 and 12
- back cover
links